Showing posts with label Robin Horasanian. Show all posts

Friday, January 18, 2019

Preserving Family Recipes

RECIPES FROM THE HEART

My project today is to encourage you to preserve those memories associated with family recipes.  Have you ever considered scrap-booking your recipes just like your photos?  The embellishment possibilities are endless.  Add personal photos or digital images.  How about fibers, buttons, pearls or Dew Drops, chip board, Scrabble tiles, ribbon...make the cards in your style or theirs!  Make a keepsake album or cookbook for yourself or as a gift.


I recently took the time to combine my grandmother's, mother's and my recipe boxes.  I found there were several that were in all three.  Some were handwritten and some were typed and my choice was to keep the earliest handwritten version of each, even if it wasn't the easiest to read.   Could I have typed them into my computer's word or recipe program and made them easy to find by an index.  Yep.  I could also have scanned them in as pictures and stored them in folders.  That's actually what I plan to do with the finished cards so that I can share them with family.  But without the actual cards, I would lose a piece of the sentiment...the history...behind them.


 I chose to work with two Authentique paper pads.  Both Saucy and Fabulous have wonderful retro designs.  Since many of my old family recipes are from my grandmother and mother-in-law the patterns are perfect.  


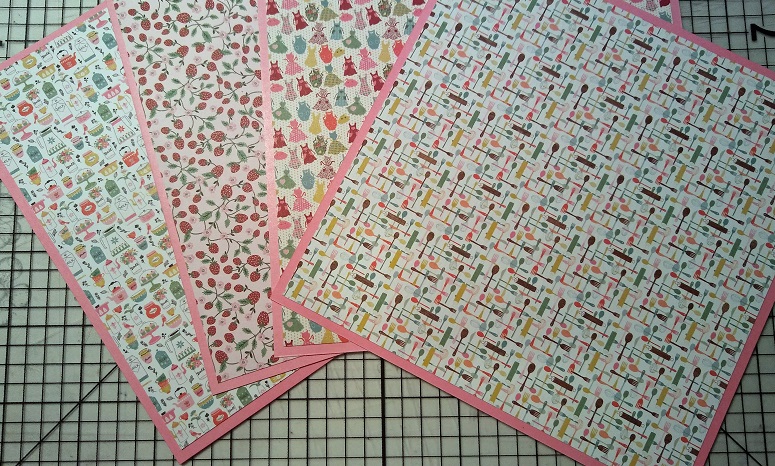
Between the two paper pads, there are a few kitchen-specific themes.  Pictured above are pans & kettles, strawberries, aprons and utensils.  I chose a pink card stock because each of these four has a pink element in the paper.  I made the decision to permanently mount these three cards because there was nothing written on the back.  You could also use photo corners.  If your recipe card has a B-side, you could pop it into a clear sleeve or glassine envelope and have it flip up to access the rest.  I plan to photocopy any of the backsides and attach them to the back of the card.


For this recipe from my grandmother, I chose to put her picture on the front.  This is one of my very favorite photos of her and my mom and I.  This is one of those recipes that was in all three boxes and I thought a photo of the three of us was a fun nod to that.  I made a brief note about the photo on the back.  Two little gold glam stickers are on the front to give it a little tiny touch of bling.  Pretty, without being too fancy.  Gram would approve.  


This recipe from my mother-in-law is from one of the first family dinners that I was invited to!  I asked what she wanted me to bring and she handed over this chicken casserole  recipe that was a family favorite.  Now that she's gone, I make it with sour cream.  I can make that change now on my photocopy without altering her beautifully written card.  It's embellished with some darling ribbon and a charm that says, "HAND MADE WITH LOVE."  Absolutely fitting for the woman who was my second mom.  The picture of the woman cooking was cut out of another sheet of paper from the Saucy paper pad.


My mother preferred her cards typed and used to pull out her old 20 lb. Royal typewriter with the sticky keys when she found one that she wanted to keep.  Even in the full size scan, you can't see that there are two pretty big folds in the card.  I can't tell if it got caught in the box or just damaged while she was cooking, but just looking at the stains on it tells me it was one of her go-to recipes.  It's probably why I love short ribs now!  This card was embellished with a pink ribbon and more fun pictures cut out of the paper pad.


Be sure to scroll down so you can access full copies of each of the recipes.  Please use and enjoy the recipes!!  


Friday, December 28, 2018

Happy New Year to all party animals!

My mom used to use a saying "Putting on the dog."  It's not something we hear anymore, but Wikipedia defines it as an expression that means 'to make a display of wealth or importance, especially by dressing stylishly and flashily'.  And isn't that what we do when we get out our fanciest party clothes for New Year's Eve?  I took it just a tiny step farther with today's card.


This fancy pooch is ready to party!  You can find her on the Hounds collage sheet.  That tiara she's wearing makes me giggle whenever I see her.

The background paper and embellishments I used on this card are all shiny and add to the festive feel.  The clear florals were stuck on more of the same red paper and then cut out and layered.  The tiniest of them are attached with foam squares to give it more dimension.


Because it's New Year's Eve, I thought a clock would tie the theme together.  The Celebrate sticker sheet has a few beautiful clock designs.  You can even choose which clock hands to use.  All of these were layered with black card stock and scraps of patterned paper and collages cut into geometric shapes.  I added a couple of Dew Drop centers to the White Gold flowers.


And the words "Time to Celebrate!" make the inside of the card bright and shiny, too!  Just sign it with a gold gel pen and it's ready to give away.  Happy New Year to one and all!


Supplies used:
Celebrate and White Gold sticker sheets  and other fun gold glam designs
Red Satin Shimmer paper
Hounds digital collage sheet
Dew Drops and glue dots
Foam  squares and double sided adhesive tape
Card stock


Friday, December 14, 2018

Christmas tags

Many crafters (including me) have been making Christmas cards to send to friends and family.  It's a wonderful way to show those you care for how much you love and appreciate them.  Another way is to create special tags for your gift boxes and bags.  The three tags below are each different styles.

This one uses a single focal image with a scrapbook paper background and a couple of embellishments.

Another style is to use a large image and either attach it to a shipping tag or simply cut your card stock into a tag shape and embellish.


And the last is a collage of themed collage images.


Whichever style you choose to create, your presents will have a little pizzazz to make the person receiving it feel special!

Check out your Christmas collage images at DIY Design Studio.  And don't just stick to Christmas.  There are collages for all types of themes and occasions!  The files are digital so it's not too late to order and start creating your own personal art!  


Supplies:


Friday, November 9, 2018

Camelot

I went to see my first play during my Freshman year of high school.  What better introduction to theater than to see Camelot?!  I love the romance and the action and, oh the music!  


I wanted to capture that Medieval feel with today's card.  Castles always have tapestries and banners so I used two different size banner dies with three of the images from the Mists of Avalon collage sheet and two pages from the Life Time Prima paper pad.  


What is royalty without a little pomp and circumstance, right?  So I added shine to these tapestry banners with some gold glam stickers and gems.


I just happened to have a crown and sword die cut in my stash and it really gives this card the Camelot feeling!  Both shapes were cut out of gold paper.


Please stop by again tomorrow for more inspirations from the DIY Design Studio Team!


Friday, October 26, 2018

Happy Halloween

I love this time of year!  
I know for a lot of people Halloween means decorating their home inside and out, but for me it is a great time to make spooky art.  DIY Design Studio has several fun Halloween collages for your art projects.


Both of my cards started out with plain card stock and a piece of punchinella.  Green ink with green paper and white ink with black paper...just to give the blank space a little texture.


I used a strip of washi tape for a background element but a strip of scrapbook paper or a piece of ribbon would also be great.  I just wanted something fun behind the main collage image.


I added a few highlights to the Halloween damsel with a white gel pen.  There is shading on the pumpkin eyes and noses.  And tracing around the skull and crossbones on her cloak and the grid on her dress really make them stand out.  


A few Dew Drops make a nice dimensional highlight.  You can also choose from the recycled glass dots for extra shimmer.  Also, see our Dew Drop glue for perfect placement.


For the card below, I used the washi tape again and also added embellishments to the skeleton's crown.


Be sure to come back again soon for another DIY Design Studio project!  Happy Halloween!


ZEN for me.

I chose to recycle a canvas box frame for my project.  I got this after Fall/Christmas for clearance at 90% off, so it was ninety cents!   Y...