Showing posts with label Dixie Belle Paint. Show all posts

Sunday, February 17, 2019

I believe everyone is thinking of SPRING

When mid-February arrives each year most people in the Northern Hemisphere are pretty much done with winter.

It's time to break out the flowers and colorful decor to cheer us up from the gloom of winter.
Here are a few items of inspiration for your home.


Paint an old frame (or dollar store / thrift shop frame) also get bunches of colorful flowers.   Hot glue them onto the frame in a pleasing arrangement and take a look at spring!  For extra pizzaz, add a few drops of your favorite essential oil on the silk flowers.  NOTE: Use painters tape to mask off the mirror before painting to keep it neat and clean.

Fresh smells of Spring can be so easy to have in your house,  What is your favorite scent?  Mine is Lilacs, nothing says spring to me like lilacs and hyacinth.  Use the essential oil of your choice with baking soda.  Or for a truly clean and freshening effect use only the baking soda and change it out every couple days.
Shake the jar daily to increase the aroma or cleansing.

Homemade Air Freshener - CleaningTutorials.net - Your Cleaning Solutions
images borrowed from cleaningtutorials.net


Add our jar accessories to make it PRETTY and consider painting the jars with our chalk paints, and our DIXIE BELLE paints.  We have brushespro brushes, and sanding tools

DIY Mason Jar Succulent
Colorful faux succulents from Stacey Turner Creations 

Have fun getting SPRINGY


Thursday, May 18, 2017

Refab-ulous Table

Let's take a table with some miles on it and make it look this fabulous.
Dixie Belle Paints rescued this well-loved wooden table.
Love the lines.
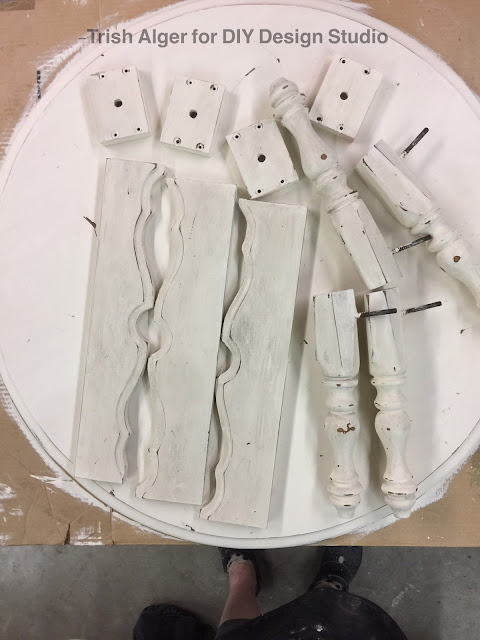
Here is the underside, after removing all of the parts:
Yep, the top of the table had a long crack in it.
Wood glue to the rescue.
Love the softness of the Buttercream.
Looking good.
A close up:
Realized there was an uneven place after gluing, so I added some Dixie Belle Swamp Mud to fill in the gaps. Sanded it down and painted a thin layer of paint over it. 
(YES, I placed the Swamp Mud over paint. These products are amazing!)
While the table top rested I did some rust cleanup. The hardware was all rusty, some vinegar in a bottle overnight did the job.
Looking pretty good now:
The smaller wooden pieces need some TLC next. See the piece in my vise? Yeah, we had another hidden crack.
Next up is the distress phase using the sander.
Love the way these curves look. Distressed and not:
Then a thin layer of Best Dang Wax over every part.
Thin layer of Grunge Glaze completes the look. You can see the difference against the bright table top:
Lastly another light layer of wax buffed on.
As I assembled the parts:
All together now:
The effect was spectacular:
This was great fun and the next large project awaits. I hope you enjoyed the process as much as I did.
Thank you and ciao for now.
-Trish Alger


Wednesday, April 19, 2017

Tiffany-ized Silver Dish

Tiffany is the height of glamour and class. 
This rescued, vintage, silver dish was Tiffany-ized.

Using Dixie Belle "The Gulf" Paint, paint tape, chip brush, and Dixie Belle Satin Clear Coat Sealer this dish was rescued from the bin.

It had little to recommend, besides the great handles and legs and the overall shape of the dish.

I taped off the legs and handles.

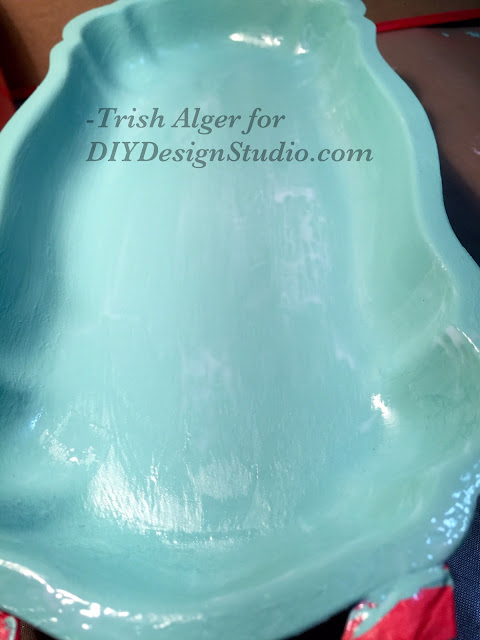
The Gulf color was the closest to Tiffany's unique blue. Coat number one:

I wanted full coverage, so I waited for the 1st coat to dry and added another:

Three thin coats did the trick. You can always sand down areas that are too thick.

I wanted a water resistant surface so the sealer was the next coat:

This is so forgiving. The sealer brushes on nicely and dries clear and fairly matte.

Here is the big reveal:

Another angle:

One with pearls, as befitting Tiffany:

Did you notice the color? Did it remind you of any other  recent projects in that color range? Yeah, that's right...it will be part of my office set---still to be complete. Stay tuned!!

Thank you for taking a gander.
Ciao for now,
-Trish Alger

Wednesday, February 1, 2017

Thrift store Up-cycle

I found this vase at the thrift store... Decided it would be perfect by my front door if it looked a little more earthy!
 
I took the vase from
to This
This
 
 Here are a few more before pictures!
 

The pictures below you can see how nicely DIXIE BELLE BUTTERCREAM PAINT goes on the metal vase.


 Once it was painted, it dried for about 2 hours.


 Then it was ready for a coat of DIXIE BELLE VAN DYKE GLAZE!


I love how it turned out!  Perfect for my entry!

Wednesday, January 4, 2017

Dreaming of BEACHES!

It has been cold here far too long.. I am ready for nice warm beaches!

 
I decided to create my own beach with a sunset!  To start I have a shell almost the size of my hand that I found a the thrift store.First I paint the water in the shell using Dixie Belle Sea Glass Chalk Paint.  I let it dry a bit.  Then with Dixie Belle Swamp Mud Texture Medium I added a small sand beach...


The beach needed a beautiful coral sky lit by the setting sun, Dixie Belle Flamingo Chalk Paint was the perfect color.  To give the sky to effect I was looking for while the  Flamingo Chalk Paint was still wet I went over it with Dixie Belle Buttercream Chalk Paint.  I love the how this is turning out.  Next I add a little of  Dixie Belle Buttercream Chalk Paint to the Dixie Belle Sea Glass water for a small wave effect.    

 
Finally, I used the Dixie Belle Van Dyke Brown Glaze to paint the  Dixie Belle Swamp Mud Texture Medium for sandy color.
 
 
Right now I am sitting on the beach trying to decide what I will do here.  Comment and let me know what should happen with this peaceful beach!

ZEN for me.

I chose to recycle a canvas box frame for my project.  I got this after Fall/Christmas for clearance at 90% off, so it was ninety cents!   Y...