Showing posts with label Valentine's Day. Show all posts

Wednesday, February 5, 2020

Sweet Valentines Day


A Valentine project anyone can do!


I love seasonal greenery and flowers

This galvanized bucket is very deep, too deep to let the flowers peek over the top.  I fixed that with risers of old clay pots turned upside down.  The advantage is the pots will still absorb water from the bucket and allow the plants to drink!  

I admit I am a dollar store junkie.  They have so many wonderful things that can be used to create awesome stuff!  A few tweaks and a little creativity - WOW.
Image result for images of BALSA wood hearts"

I got the (balsa) wood hearts (dollar store) in different sizes and I used my paper stash along with Alene's clear glue to cover the wood.  I had a thin wooden dowel rod and bought another one, (49¢) at Michaels (or Ace Hardware, Home Depot, Lowes, etc).  Notice I used a red doily, they come in many sizes and colors at the dollar store too!  I trimmed mine to fit.

If you cannot find the wood hearts, you can cut foam core board from the dollar store.  It comes in large size sheets in the craft or school supply area.

Image result for images of BALSA wood hearts

You can paint the backside of the hearts and paint the dowel rods with acrylic paint (less than $1.00).
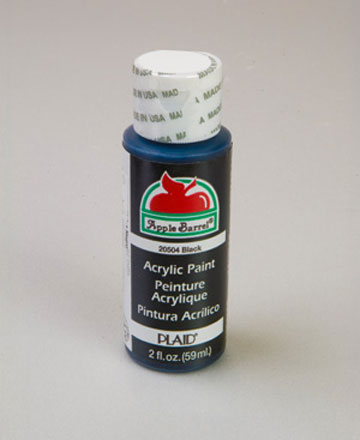
Image result for image OF BLACK ACRYLIC PAINT BOTTLE"

I started out wanting to use E6000 to glue the hearts together and the rods to the backs.  However, they are so lightweight I did not need to use that.  E6000 is great for sturdy adhesion however IT takes long to dry.  I glued the hearts together with Alene's clear glue and I actually used clear packing tape to affix the rods to the back of the hearts.  This is handy if you are going to store them and need to dismantle to lay flat.  


I have many hangers and nails in my garage walls on which I hang seasonal items and seasonal artwork. Saves space and it's cheery!  Happy creating!!

Happy Heart Day from Jean and Eddie


Saturday, January 5, 2019

Sharing Inspiration

We are excited about the Valentine's Card Exchange and have ideas swirling around for our card creations.


Here is some inspired cards and art for you to peruse.


We have glassine envelopes and gems and papers and ATC size cards with envelopes too!


Flowers and specialty papers Galore!

Card/book by Trisha Neal using Digital collages 

Tags and trims and more collages!


Our digital collages are Da Bomb for making cards with themes.


Friday, January 4, 2019

Trust Your Heart


This  month DIY Design Studio is bringing you "Art from the Heart" and we encourage you to join us. 

Tag us on social media and show us what you create with #DIYartfromtheheart.
  

Come along with me on my very first project of 2019!

I have created a mixed media piece by upcycling a heart shaped chocolate candy box that I saved from Valentine's Day 2018.  To create this I used cardboard pieces, gesso, acrylic paints, Gelatos, misc. inks,  chipboard as well as lace and other embellishments
Here was the process.  
 I applied gesso to the box, then added torn cardboard using Aleene's Tacky Glue
Another layer of gesso was added so there was a primed surface for everything else to adhere to.  Not necessary, but I just tend to gesso most surfaces. 
 Next, came a layer of pink and white acrylic paints
Next, I dry fit papers, die cuts and vintage Rolodex cards for a textural base. 
Lace was added and painted paper hearts were attached with mini clothes pins, paper flowers and more painted card board pieces were glued down. 


I also added a little text sentinment for a title.  I just printed this on my computer and outlined it using my micron pen and adhered it with Tacky Glue. 
You can better see the paper flowers I used in the pic below.  These specifically came in white and I added the same pink ink to the centers that I used to colorize my background of the entire piece (you can see the drippy ink elements in the 2 photos above).  I also dry brushed a bit of black acrylic paint to the edges of the petals.  You can NEVER have too many layers of color.  The Little Birdy paper flowers are very pretty on their own, but colorizing them to 100% match the other elements ties the whole look together.  
The final element was diluting white acrylic paint and adding white splatter marks to the entire project.  Okay, that gets everywhere so be aware of that before you go flinging watered down paint on your work of art. You will find white little dots for days.  But, hey that is all part of the fun!  Get a little inky and painty...it is good for your soul!  Oh, a fan brush works best for splatter...well that or running your finger along a toothbrush drenched in watered down paint.  WHAT FUN!!! 

I hope you enjoyed this project.  
I hope your New Year is off to an amazing start.  
I also hope you are inspired to make Art from YOUR Heart.   Stay tuned for more inspiration from the DIY Design Team!

Be sure to check DIY Design Studio for all of your 
craft, vintage and painting supply needs!
Happy Friday! 
~Stephanie


ZEN for me.

I chose to recycle a canvas box frame for my project.  I got this after Fall/Christmas for clearance at 90% off, so it was ninety cents!   Y...