Showing posts with label glaze. Show all posts

Wednesday, August 10, 2016

Reviving an Old Tray with Dixie Belle.

Hi, Stephanie here and welcome to my first
DIY Design Studio Project. 

I know this will be one of many as I just can't get enough DIY home and craft projects and

Follow along to see the special going on this week..


For this project I chose a beat up metal tray that previously housed a very pretty floral arrangement, but it no longer matched my decor.  The flowers were repurposed into a pretty fall wreath and the tray, well I will show you the steps I took to revive it into something a bit more "me".

You can see below the old scratched up tray.  It is about a foot and a half long by about 6 inches tall.  It always worked great as a dinning table centerpiece because it is low profile so you don't have to strain your neck to chat with the other guests.  As I said above, I removed the floral arrangement and all of its remnants including hot glue and florist foam.  


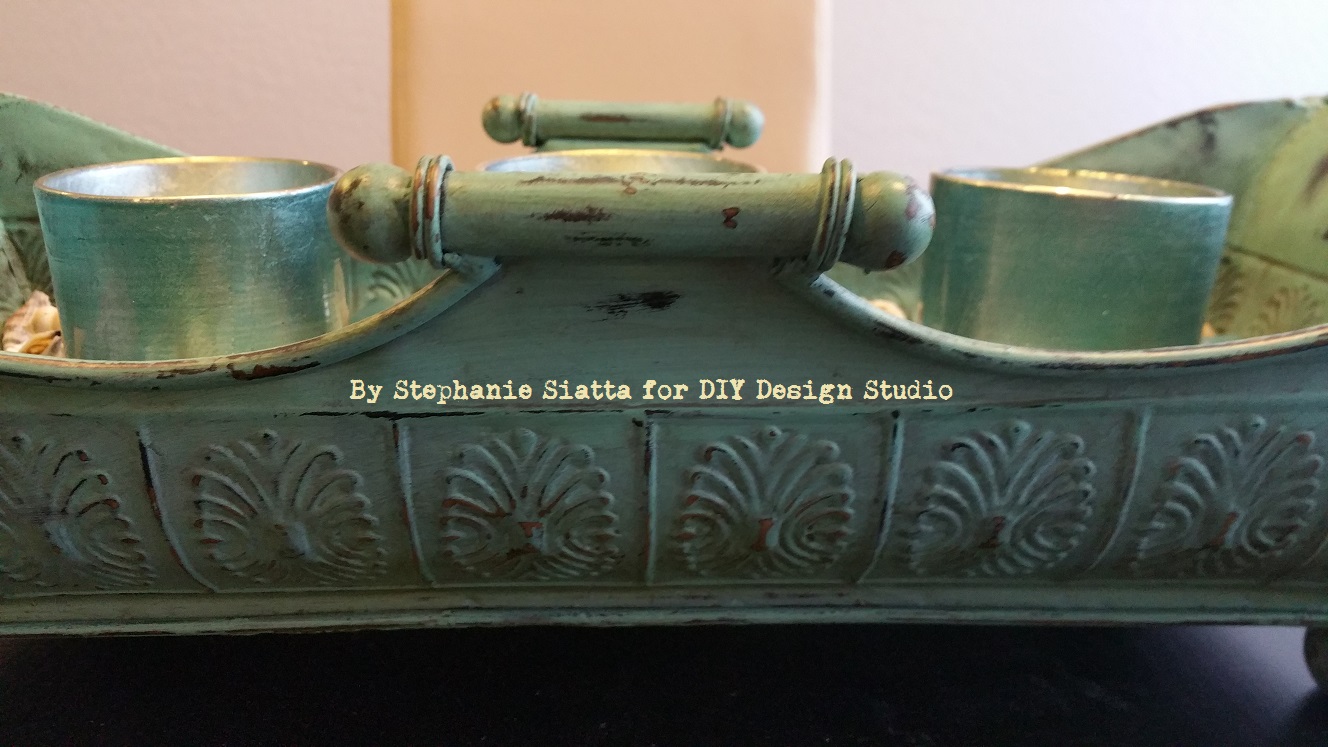
And, here you see the tray painted with the first coat of  Dixie Belle Paint in Gulf.  I did give it a light wipe off and sanding prior to painting just to get good adhesion.  This was probably not necessary.  

You can find a great sanding sponge  Here.  

I gave it two coats of paint.  Here you can find a great chip brush to use.


I then sanded again, but this time I was pretty vigorous.  I really wanted to knock a good bit of paint off to reveal the finish below.   


Then, I added a coat of Dixie Belle Grunge Glaze.  This really made all of the raised detail and distressing that I did pop!  As soon as I started painting this step I literally was ooohhing and awwwwing.  You know you've done it before when your project just hits that next level of great.  The Grunge Glaze did that for me.


Finally, I added a coat of Dixie Belle Clear Satin Sealer.  This will ensure years of pretty service as a center piece, candle holder, utensil caddy on my buffet...whatever I want, really.   


This time around it is a bit coastal with sea shells, beach glass and three turquoise mercury glass tea light candle holders. 


In a month or so, it will be full of gourds, mini pumpkins, fall leaves and fall scented candles.  

Then, I see skulls, bats, owls and spiders...black, orange, green, purple.....I bet you know where I am going with this.   And, so on and so on for fun decorating for every season and holiday. 

I can even repaint it over and over if I so choose and Dixie Belle will be the paint of choice for me!  There are so many fun colors to choose from and each layer will only make it better.


Make sure to pick up all the supplies you need to get DIY-ing at

We still have our special going = purchase 50.00 and get a FREE Paintbrush, spatula and sanding sponge.    NO coupon necessary, regular shipping applies to orders.

Thanks so much for joining me and DIY Design Studio!
~Stephanie Siatta

Saturday, August 6, 2016

From Gold to Grunge

Don't we all have an old frame or two in the garage?   I know I have way too many, (as my husband reminds me).

I decided to see what I had, as I had bought a new piece of art and the size was unusual. Normally I would go to the framer, but I thought, wait a minute I think I have one that might just fit with some adjustments.  The frame came from a garage sale and that person had bought it at Goodwill, just like my intentions for all those "bargain finds" that never get completed.

Lovely, but not my style....


READY?

I started by wiping it off with a damp rag just to get any garage ca-ca off of it.   Then the fun begins.   I chose Driftwood for my base color.   I often add clear coat to my paint, in this case, I did not as I wanted heavy coverage to get rid of the gold.


I allowed this coat to dry.   

I noticed that the flaws of uneven miters showed up, so I added swamp mud in the miters to make it look more professionally done...Hey, what do I want from a $1.00 frame???


I made sure to even it out and wipe off excess using my fingers.  I rubbed it away from the decorative beading so I would still have definition of the beads.   I again, allowed it to dry thoroughly.

Another coat of Driftwood covers the miter fix-up.


NOW FOR THE REAL FUN!!!


Grunge Glaze applied with cheesecloth.


You can use a brush if you want, or an old towel or jersey.   For this amount of decorative detail, I thought the cheesecloth would allow me to get into nooks and crannies.  At the same time, I did not want pools of glaze "clogging up" the details and this allowed me freedom.


I worked the glaze until I felt it was just right.  It is so incredibly easy to use and it's water based, so cleanup was simple with soap and water.


Dried again and a review of the appearance, then a layer of clear coat to seal in all the yumminess.

Now to frame the art.  The frame had a dated mat with a gold layer.   Not the ticket for this new one.  I dismantled the mats and then cut the art to fit the mat.  I think it now looks like a well loved frame perhaps from an old salon, what do you think?


Here we are, what a transformation!  The art is funky and the frame tempers the funkiness, I think. 


The art was created by LuLu My Pink Turtle from Canada.


ZEN for me.

I chose to recycle a canvas box frame for my project.  I got this after Fall/Christmas for clearance at 90% off, so it was ninety cents!   Y...